

how to draw a deer head
Want to make a deer head cartoon? I'll be showing you how to describe a deer head with footstep-by-step images that make information technology easy.
These images will be a great outline for you to draw a cartoon deer head in a matter of minutes.
Permit's get started!
Drawing Supplies Needed
Yous tin utilize any drawing supplies to make a deer sketch, just here are the best tools for drawing.
If yous want to learn how to draw a deer, hither's a tutorial to draw full-sized deer.
Footstep 1:

Start with two circles, i big and 1 small.
Step two:
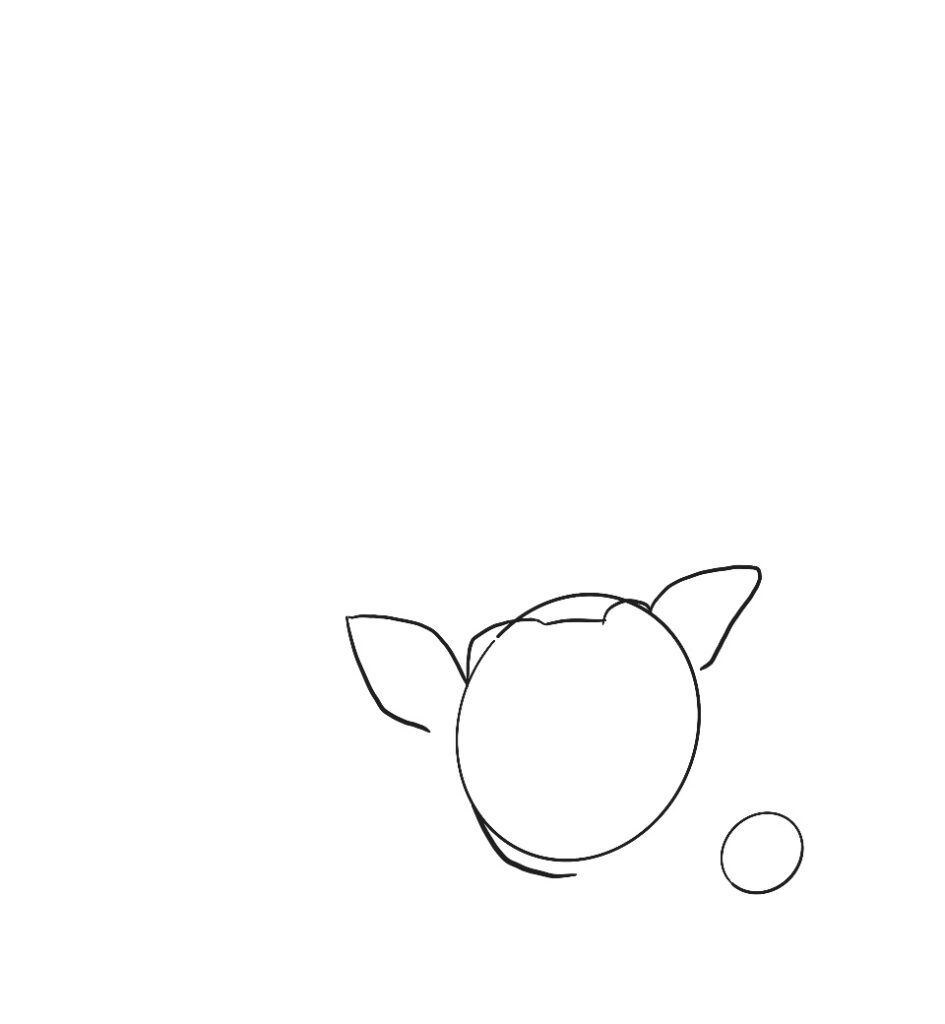
Starting from the bigger circle we're going to brand two circular bumps on either side, make certain they extend a bit into the circle and the left ane comes OUT of the circle.
At the end of these bumps we'll make 2 soft triangles of the ears, and finally at the bottom left of the circumvolve, extend a curved line only a bit along the bottom.
Stride three:

Connect the soft triangle on the left to this last curved line nosotros made by adding another line.
On the right side, take the smaller bump downward in a dip earlier adding a crash-land at the base of the ear. Finally connect all these lines to the smaller circle with a slight curve inwards.
Step iv:
Erase all your overlapping lines!
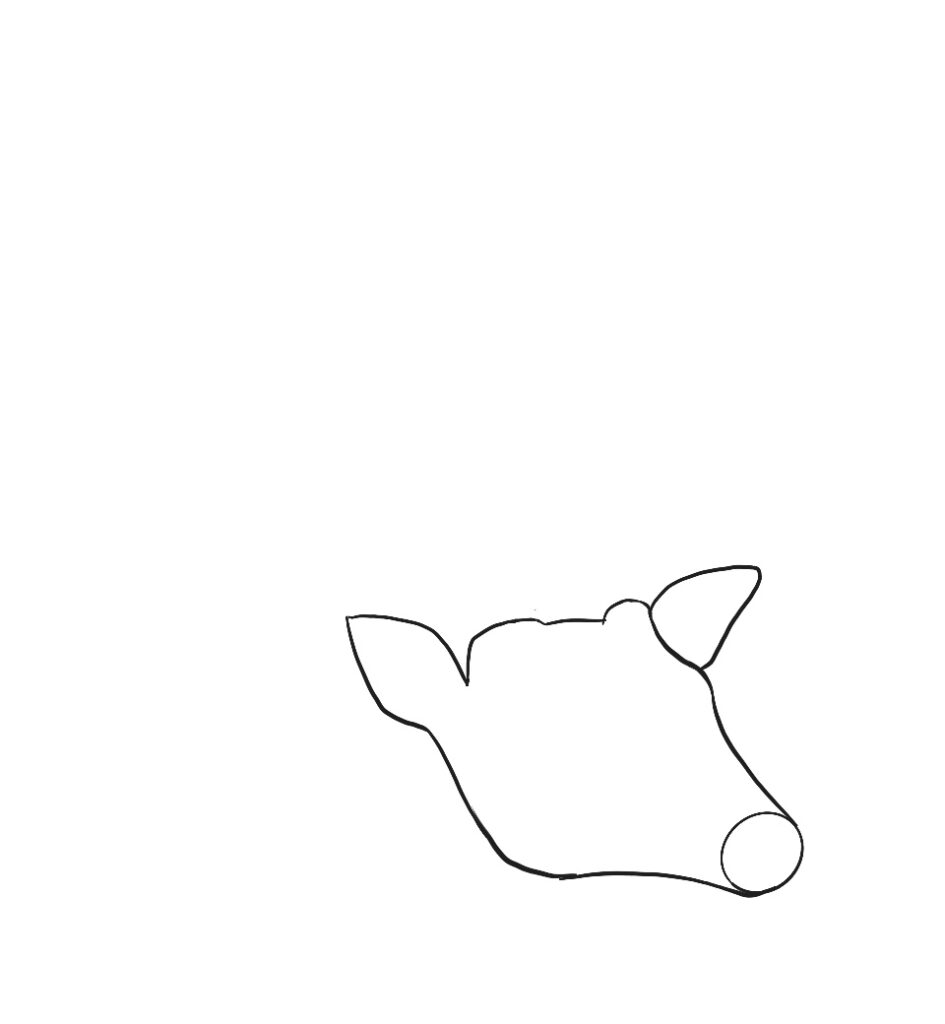
Pace five:

At the small circle make a slightly curved line through the lesser 1/iii. Further back we'll brand an almond shape for the eye, but make it very curved!
Brand certain it extends a fleck on the inside (the side closer to the snout!)
Step half dozen:

Let's outline the inner ears, and add the nose! The nose should look like a whale tale but i of the fins can't exist seen.
Step seven:

Now fill up in the nose, erase the circumvolve overlapping lines, and add lids to the eye! Next we're going to do details!
Step eight:
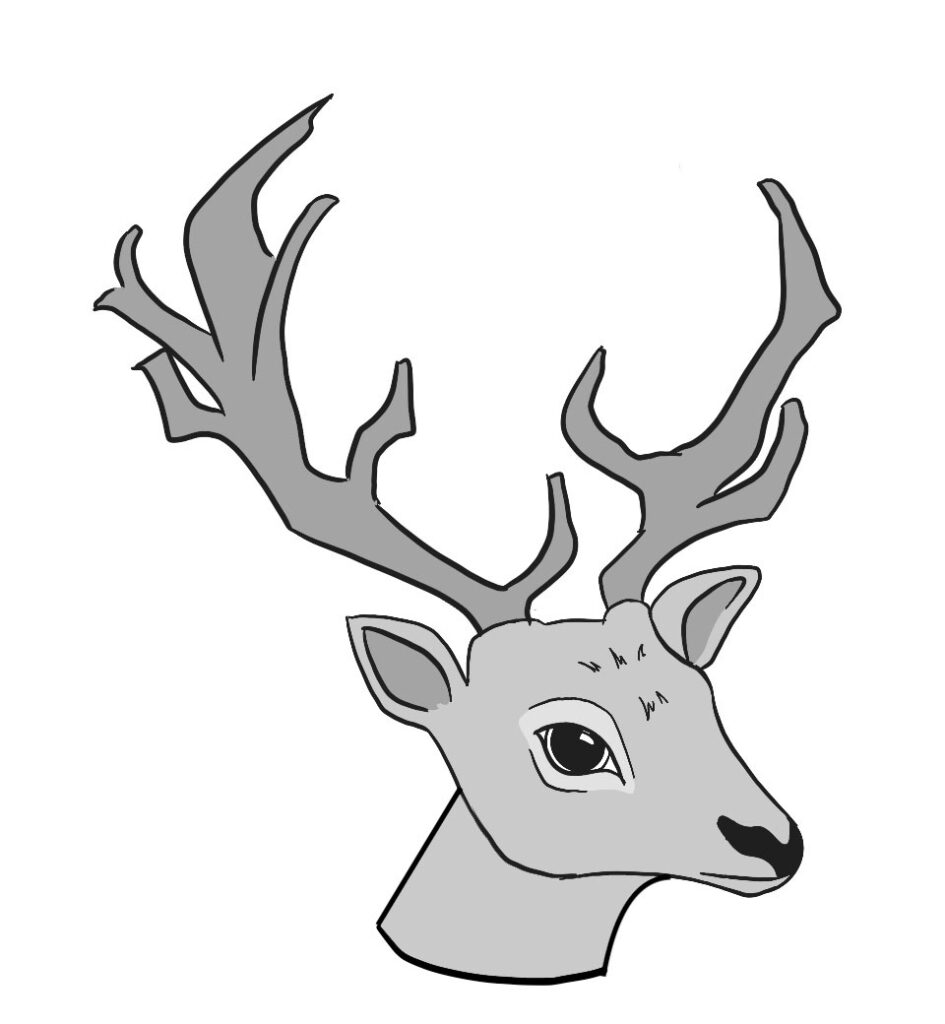
First, let's do the antlers. You tin do them the same way you lot'd practice tree branches, just be sure you go on in mind that we have one side closer to us then we'll see more of information technology!
Make sure none of your lines are perfectly round, equally the angular lines will help requite the antlers some shape.
For the middle, make a half circle in the almond shape and make full in most all of it – leaving a minor bit on the outer band uncolored. Erase a flake of the black fill up towards the top for the highlight.
At present let's depict the neck! At the signal of the head where the snout is coming into the cheek, extend a curved line down.
Correct behind the cheek, about i/2 way to the ear, make a straighter (but not fully straight) line also extending down and connecting the two with a curve.
Finally colour in your deer head! Possibly add a few piffling fur lines and yous're done.
Other related topics to help y'all draw animals:
- How to Draw Dogs – Easy Step by Step Tutorial for Cute Dogs
- How to Draw a Dolphin (9 Easy Steps with Pictures)
- Draw a Cat in a Box in Quick and Piece of cake Steps
- How to Draw a Realistic Gorilla in vi Steps
- How to Draw a Dragon (Stride by Pace with Pictures)
Thank you Carolyn for this astonishing step-past-stride process. You can view her social @ClazDesig if you enjoyed her illustrations. Check out her shop where she has amazing illustrations.

Agile Fourth dimension xx minutes
Total Time 20 minutes
Difficulty Easy
Estimated Cost $0
Materials
- Pencil
- Paper
- Or tablet and stylus
Tools
- Pencil
- Paper
- Or tablet and stylus
Instructions
- Step 1:
Showtime with two circles, 1 large and i small.
- Step 2:
Starting from the bigger circumvolve we're going to brand two round bumps on either side, brand sure they extend a chip into the circumvolve and the left one comes OUT of the circumvolve.At the stop of these bumps we'll make two soft triangles of the ears, and finally, at the lesser left of the circle, extend a curved line just a chip along the bottom.

- Footstep 3:
Connect the soft triangle on the left to this concluding curved line we made by calculation some other line.
On the right side, take the smaller bump down in a dip before adding a bump at the base of operations of the ear. Finally, connect all these lines to the smaller circle with a slight curve inwards.
- Step 4:
Erase all your overlapping lines!
- Step v:
At the pocket-size circle make a slightly curved line through the lesser 1/3. Further dorsum we'll make an almond shape for the eye, but make information technology very curved!Make certain it extends a bit on the inside (the side closer to the snout!)

- Step 6:
Allow's outline the inner ears, and add the nose! The nose should look like a whale tale but one of the fins tin't be seen.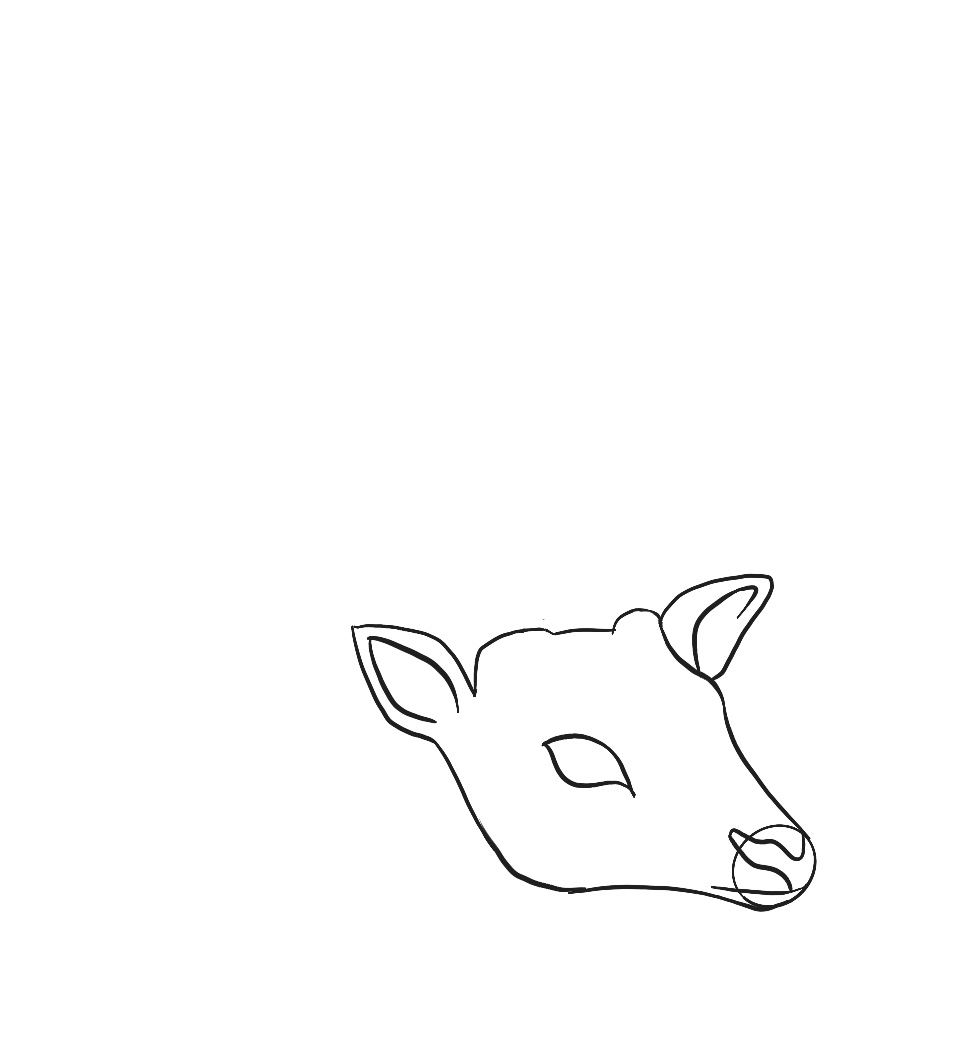
- Pace vii:
Now fill in the nose, erase the circle overlapping lines, and add together lids to the eye! Next, we're going to practise details!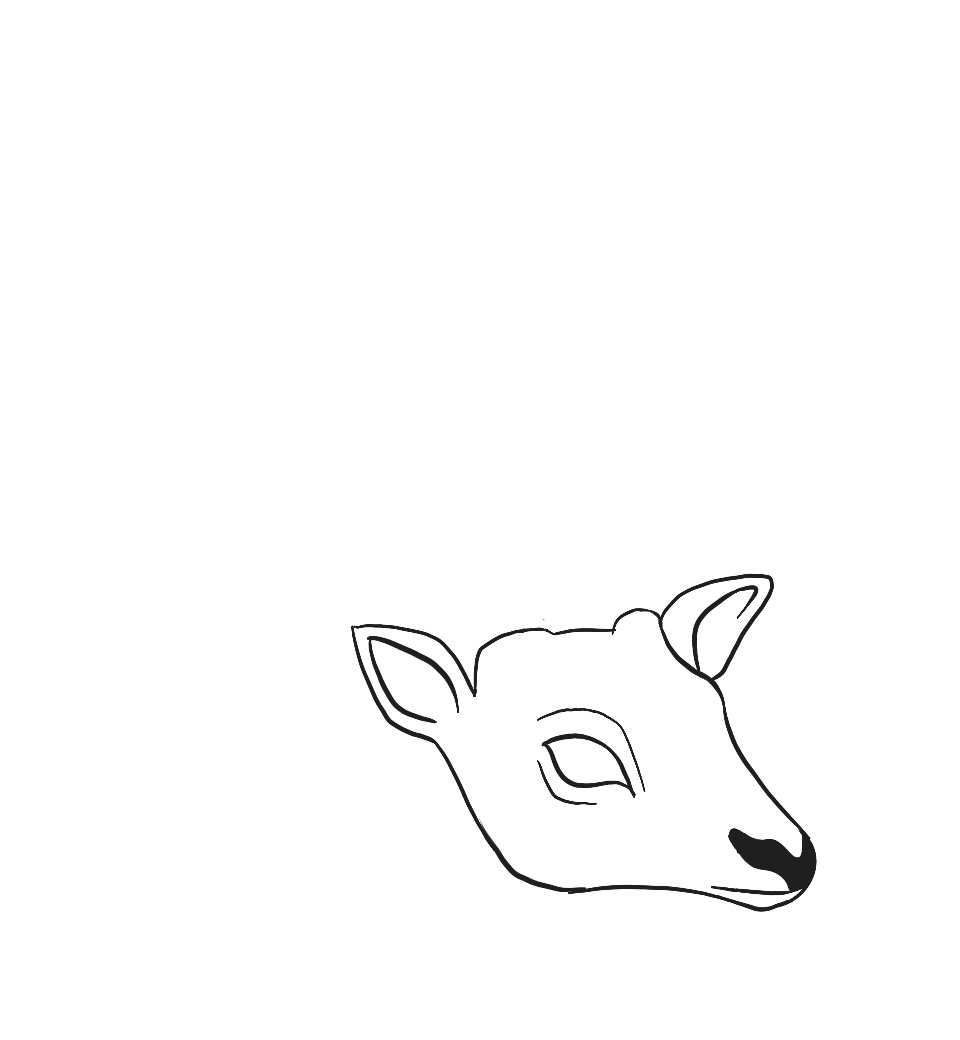
- Stride viii:
First, let'south do the antlers. You can do them the aforementioned way you'd do tree branches, merely exist sure you keep in listen that we have one side closer to us and then we'll see more of information technology!Brand sure none of your lines are perfectly round, every bit the angular lines will help give the antlers some shape.
For the eye, make a half-circumvolve in the almond shape and make full in almost all of it - leaving a small bit on the outer ring uncolored. Erase a chip of the black fill towards the peak for the highlight.
Now let'due south depict the cervix! At the signal of the head where the snout is coming into the cheek, extend a curved line down. Right behind the cheek, about i/2 way to the ear, brand a straighter (but non fully straight) line likewise extending downwardly and connecting the ii with a curve.
Finally color in your deer head! Maybe add a few little fur lines and you're washed


Source: https://jaejohns.com/how-to-draw-a-deer-head/
Posted by: solisviturts.blogspot.com
0 Response to "how to draw a deer head"
Post a Comment